Picture solar panels on your roof. That is usually what homeowners see first, and often the only part they picture at all. But a residential solar installation is a complete system, and the panels are just the most visible piece of it. If you are gathering quotes for your Kelowna home, knowing what sits behind and beside those panels is what lets you judge a quote instead of simply comparing a price.
This post opens our series by walking through everything a residential solar installation on an Okanagan roof actually includes, in the order it happens. We will look at site assessment and system design, the inverter that links your panels to the grid, the racking and flashing that hold everything down and keep water out, the DC and AC electrical work, permits, utility interconnection and commissioning. We will also cover what to check on your quote, line by line. West Winds Holdings offers consultations and works with our qualified installation partner, so you can get straight answers before you commit.
Your Roof Is Getting a System, Not a Panel Order
"Residential solar panels" is a useful shorthand and a misleading one. The panels are one of at least six parts that together make a working residential solar installation, and on their own they do nothing your home can use.
A solar panel produces direct current (DC). Nothing in your house, and nothing on the grid, runs on that until an inverter converts it to alternating current and the wiring, disconnects and utility connection carry it where it needs to go. Interconnection requirements treat the whole assembly as one system, not a panel purchase.
That gives you a practical test for any quote. If it lists panels and a total but no inverter, racking, electrical scope, permit or interconnection line, it is incomplete, not inexpensive.
This guide follows a Kelowna install in the order the work happens: design and site assessment, inverter, racking and flashing, DC and AC electrical, permits, utility interconnection, then commissioning. The sequence matters because each stage depends on the one before it. Skipping a step rarely removes the cost; it moves the problem somewhere more expensive later.
Site Assessment and System Design: Where the Plan Starts
Before panels, racking, or a quote total, the plan starts on your roof.
A residential solar installation starts with your roof, not a product. A proper site assessment looks at orientation, pitch, shading from trees or neighbouring buildings, and the age and condition of your roof covering. If the shingles are near the end of their life, replacing them after the panels go up means paying for removal and reinstallation.
Your household's electricity use belongs in the same conversation. Size a residential solar power system too small and you buy more grid power than you needed to; size it too large and you spend on equipment you cannot use. Both cost you money over time.
The design ends in a single line diagram, a simple drawing of every electrical component and how it connects. Utilities typically want one with the application, often alongside a site plan showing where each piece of equipment sits, such as this sample site plan from BC Hydro.
Ask how shade was assessed. Good designers place panels to limit losses, not simply to make tidy rows.
Most importantly, nothing should be ordered before the roof assessment and design are settled, even if a quote promises a fast start.
Next: the inverter, where your panels meet the grid.
The Inverter: Where Your Panels Meet the Grid
Once the design is settled, the inverter becomes the component everything else routes around. Your panels produce DC electricity, and nothing in your house or on the grid can use it until it's converted. FortisBC's Net Metering Interconnection Guidelines state that the end conversion for utility connection must be 60 Hz alternating current. That requirement is why the inverter sits at the centre of the design.
The same rules treat the inverter as the grid interface: it's where the system's behaviour around the utility is set. Certification isn't optional either. The FortisBC net metering application asks whether the grid-tie inverter is certified under CSA C22.2 No. 107.1-01, and requests its manufacturer and model. That paperwork goes into your file.
Inverter choice also shapes two things homeowners ask about later: how the system is monitored, and whether a battery can be added down the road. Ask which type is quoted and why it suits your roof layout and future plans.
Finally, expect the inverter on your quote as a named line item with a model number, not a vague "inverter included." Ask for the datasheet so you can see what you're actually getting.
Racking and Flashing: What Holds the Panels Down and Keeps Water Out
With the inverter sorted, the next question is what the panels actually sit on. Racking is the mounting structure that attaches residential solar panels to your roof and holds them at the designed angle and spacing. It has to suit the wind and snow loads your property actually sees, which is why roof-mounted systems have their own design criteria and roof covering requirements.
Flashing is the weatherproofing around each roof penetration. Done well, it keeps water out at every attachment point. Done poorly, it becomes a leak claim years after the installers have left.
Attachment details change with roof type. Ask how tile, metal, standing seam or asphalt shingle is being handled on your home, rather than accepting a generic answer.
Roof penetrations can affect your roofing warranty. Get that answer in writing before work starts, because your roofing manufacturer or insurer may ask later.
Once the panels are on, racking and flashing are largely hidden. Review the attachment plan and layout drawing while they are still visible on paper.
Next, the wiring that moves power from the array to the inverter and into your home.
DC and AC Electrical: The Wiring, Disconnects and Safety Devices
Once the racking is set, the electrical work ties the array into your home. String wiring carries DC power from the panels to the inverter. Conduit, proper support and outdoor-rated components protect that wiring from sun, water and wildlife, a genuine consideration on Okanagan roofs where squirrels and UV do not take the summer off.
On the AC side, the system connects to your electrical panel through a dedicated circuit and an AC disconnect, so the whole system can be isolated from the house when needed. DC disconnecting means at the inverter and near the array, plus clear labelling on all solar equipment, tell a future electrician or first responder what is live. Grounding and bonding of the array and racking sit inside Canadian Electrical Code requirements for renewable energy systems, which is why this stage belongs to a licensed electrical contractor rather than a general crew.
Before you approve a design, ask two questions: how can the array be safely isolated in an emergency, and how does the monitoring system report a fault? Then confirm the answers show up in the design.
Permits: How the Work Gets Declared and Inspected
All of that wiring and safety work has to be declared before it happens. In British Columbia, a residential solar power system requires an electrical installation permit. Since January 1, 2019, Technical Safety BC treats solar panels as an "alternative energy system" on that permit rather than declaring them at their purchase price.
That distinction matters to you. The permit is built around the type of work being declared, not what you spent on equipment, so an expensive panel package does not inflate the fee.
Technical Safety BC's published examples, accurate as of July 2025 and subject to change, show $211 for a solar-only installation on a dwelling, and $110 for the solar and battery portion of a system bundled with new home wiring, plus $401 for the wiring and service work. Treat those as illustrations of how fees are assembled, not as quotes for your Kelowna roof. Your fee depends on the work at your property and the current fee schedule.
Your licensed electrical contractor should pull the permit, and an inspection closes it out. An unpermitted system creates real problems at resale and when you make an insurance claim, so it belongs in the quote as a line item, not a loose end.
Next: the utility has its own set of rules.
Utility Interconnection: The Rules Your System Has to Meet
With the permit underway, the next gate is the utility. Any grid-connected system has to meet the interconnection rules of the utility serving your property, so confirm those requirements with your installer and the utility before equipment is ordered.
As a published BC example, FortisBC's Net Metering Interconnection Guidelines set minimum requirements for net-metered systems up to 50 kW and below 750 volts, and state that electricity must be converted to 60 Hz alternating current for connection to the utility system. The same guidelines say FortisBC protects only its own equipment, while the customer is responsible for protecting their own so that faults on the utility system do not damage it. Treat that as a design and equipment responsibility your installer should be covering, not something you manage yourself.
The guidelines also advise discussing your project with the utility at the conceptual stage, well in advance of purchasing or installing equipment. Systems designed before that conversation happens can stall.
Every net metering application needs a single line diagram, plus the inverter's manufacturer, model and certification under CSA C22.2 No. 107.1-01. Net metering rates, credit carry-over and program terms change, so check current terms with your utility rather than relying on any summary.
Commissioning and Handover: Getting the System Switched On
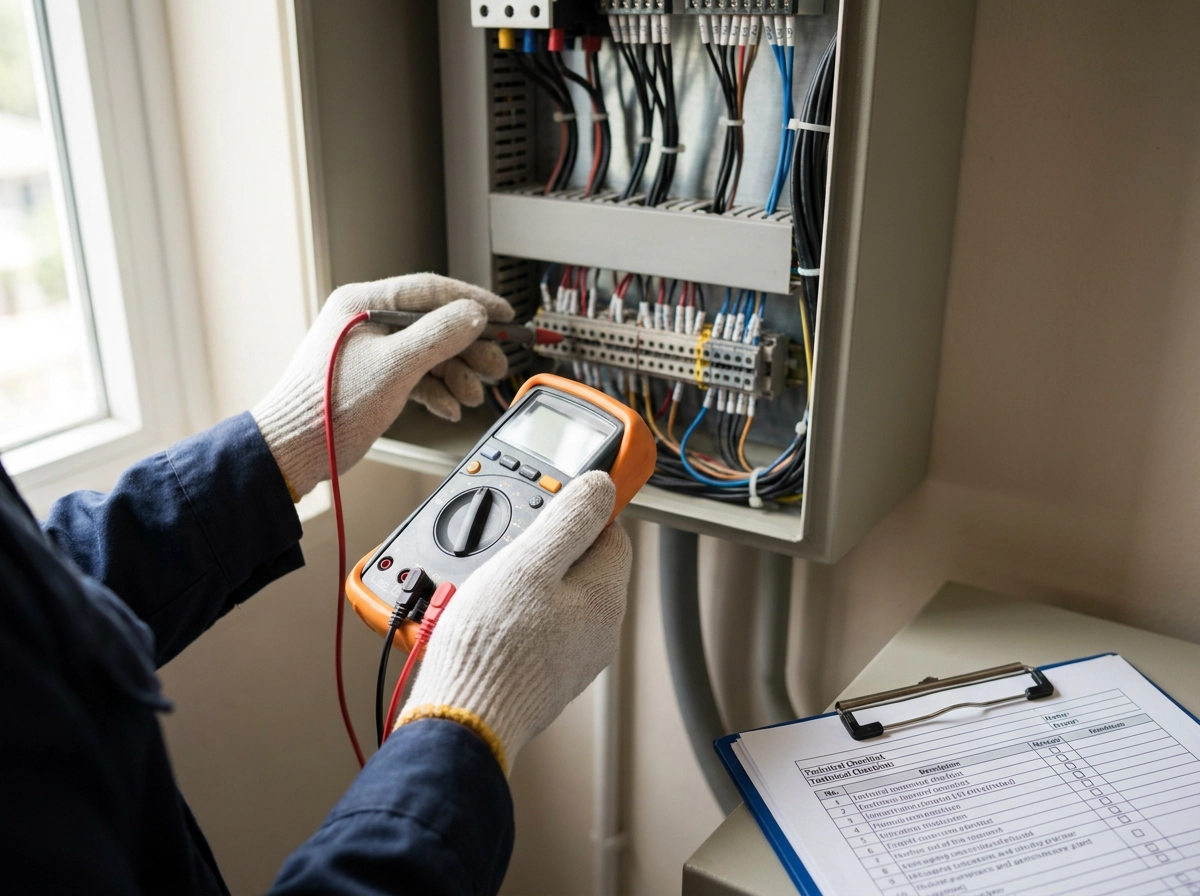
Commissioning is not just flipping a switch. It is the stage where the finished system is tested and proven before handover, and a careful installer documents that work rather than turning it on and walking away.
Expect verification of wiring polarity, grounding and insulation resistance, confirmation that the inverter is communicating, and a check that monitoring is reporting production the way it should. Anything off gets corrected now, not discovered in February.
Ask for the handover package: the as-built single line diagram, equipment make and serial numbers, inverter certification details, and the permit and inspection records.
Two approvals gate the switch-on. The electrical inspection and the utility's authorization both need to be complete before the system is cleared to operate and export power, so ask who is tracking those steps and what the timeline looks like.
Finally, get a plain explanation of what your monitoring app shows, what normal production looks like in your first weeks, and who to call if output drops unexpectedly. Write that contact down somewhere you will find it.
Hold onto those documents. They are the benchmark for everything that comes next.
What to Check on Your Quote, Line by Line
With the handover package in mind, you know what a finished system involves. Now read the quote the same way. A complete residential solar installation quote lists every piece as its own line: panels, inverter with make and model, racking, flashing, DC and AC electrical scope, disconnects and labelling, permit, utility interconnection support and commissioning. If any of those is missing, you are looking at an incomplete quote, not a cheaper one.
Look for a single line diagram, or a firm commitment to produce one, since the utility application requires it with every submission.
Confirm in writing who pulls the electrical permit, who files the net metering application, who attends the inspection, and who handles follow-up on monitoring or production issues.
Ask specific questions rather than general ones: which inverter and why, how attachment points are flashed, how shading was modelled, what happens to the roof warranty, and what the process is if production does not match expectations.
Be cautious with any quote that prices only a total, avoids model numbers, or treats permits, inspections and paperwork as your job.
Collect two or three quotes in the same format. That makes the components visible, so you are comparing systems instead of comparing headline numbers.
The Takeaway: A System to Evaluate, Not a Price to Compare
You are not comparing prices at this point. You are comparing systems. A residential solar installation is a designed package: site assessment, inverter, racking and flashing, DC and AC electrical, permits, utility interconnection, and commissioning. Each stage has a purpose, and most leave a document behind, from the single line diagram to the permit and inspection records. A quote that names its parts is easier to check, and easier to compare fairly.
Work through the quote checklist above. Ask for named equipment, a single line diagram, and a clear answer on who pulls permits and files utility paperwork.
Then confirm the current rules yourself. Permit requirements change, so check with Technical Safety BC, and verify interconnection and net metering terms with the utility serving your property, since those change too.
West Winds Holdings is a Kelowna-based business that helps homeowners understand their energy needs and assess practical residential solar, battery backup and off-grid options. We connect customers with our qualified installation partner, Energy Economics.
If you would like to talk through what a system on your roof would actually involve, request a no-obligation local consultation.
Conclusion
A residential solar installation is a designed system, not a panel order. The strongest quotes name the inverter, racking, flashing, electrical components, permits, utility interconnection and commissioning, and they make clear who handles the paperwork. Compare those details line by line instead of comparing headline prices. Also confirm current rules yourself, since permit requirements and utility net metering terms can change. Technical Safety BC and your local utility are good starting points. For homeowners in Kelowna, West Kelowna, Lake Country, Peachland and the wider Okanagan, that diligence leads to a system that fits your roof and your goals. When you are ready, request a no-obligation local solar consultation with West Winds Holdings. They can help you understand your energy needs and connect you with their installation partner.